什麼是 Google Cloud Platform (GCP)?
Google Cloud Platform (GCP) 是 Google 提供的雲端運算服務套件,其核心價值在於提供與 Google 內部相同的強大基礎設施。針對網站架設,GCP 提供三種高品質路徑:1. Google Compute Engine (GCE):提供高度自定義的虛擬機服務;2. Google Kubernetes Engine (GKE):業界領先的容器編排平台,支援滾動式更新與自動擴展;3. Cloud Run:基於 Knative 的 Serverless 容器服務,讓開發者只需準備 Image 即可快速上線。此外,GCP 整合了 BigQuery(分散式資料倉儲)與 Dialogflow(AI 對話引擎),讓企業能輕鬆構建具備大數據分析與智慧語音助理能力的現代化雲端應用。
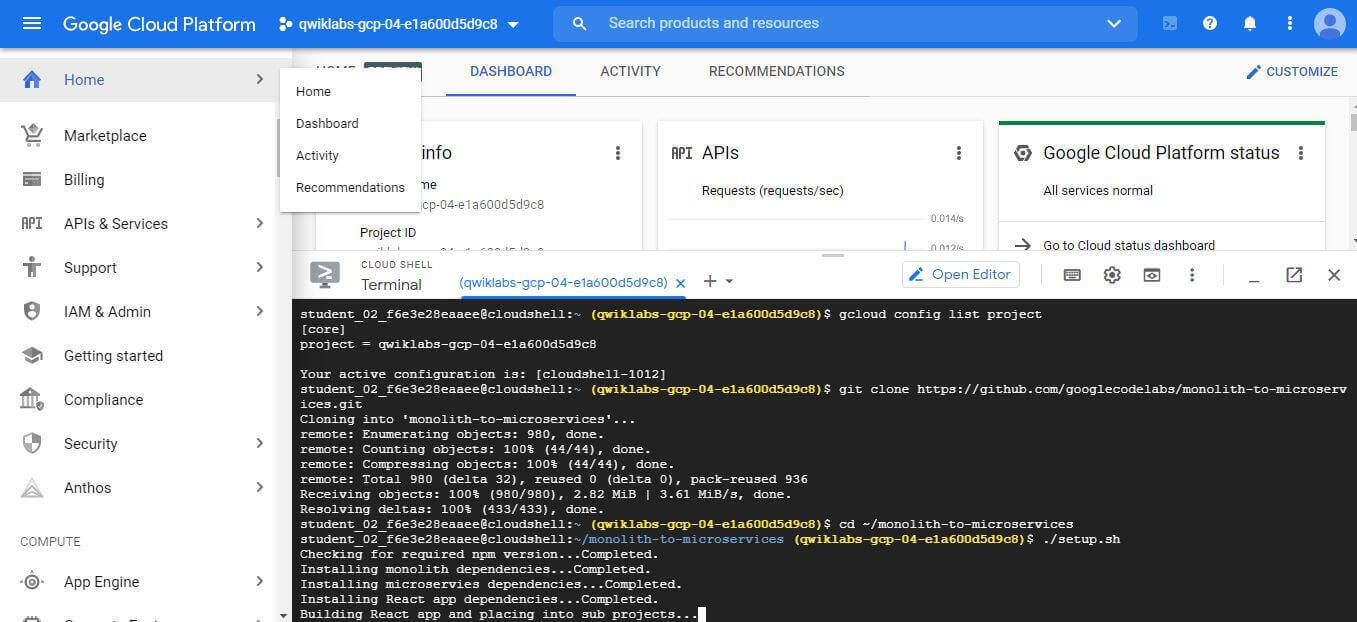
本文分享 Google Cloud Study Jam 2021 的實作體驗。GCP 雖然提供圖形化介面,但其強大的 Cloud Shell 指令行工具讓配置能透過程式碼控管,大幅降低錯誤率。
一個 Cloud Shell 介面可以完成八成的事情。
網站服務架設的三種方法
目前在 GCP 架設網站服務主要有三種方法:
- Google Compute Engine: 開虛擬機 (instances),剩下導流、防火牆等都如同本機設定
- Kubernetes (K8S): 管理容器的工具
- Cloud Run: 用 Knative 來簡化 K8S 流程
Google Compute Engine
- 設定 region 和 zone:
gcloud config set compute/zone us-central1-f - 透過控制台或是下指令: 設定機台 n1-standard-1 後,手動部屬並啟動前後端程式
1 | gcloud compute instances create backend \ |
- 防火牆: 前端 8080 後端 8081-8082
1 | gcloud compute firewall-rules create fw-fe \ |
- 建立樣板,方便之後做水平擴展
1 | gcloud compute instance-templates create fancy-fe \ |
- 群組管理,前端 8080 後端 8081 orders、8082 products
1 | gcloud compute instance-groups managed create fancy-fe-mig \ |
各步驟中會常用的指令:
- 列出
- 主機:
gcloud compute instances list - 樣板:
gcloud compute instance-templates list
- 主機:
- 停機:
gcloud compute instances stop frontend
設定監控 health-checks
設定監控的方式理論上各個服務都相同,就是針對 port 或是路徑去做監控,這裡就只貼上 Google Compute Engine 的案例。
- 設定 health-checks
1 | gcloud compute health-checks create http fancy-fe-hc \ |
- 開啟 health-checks 防火牆權限
1 | gcloud compute firewall-rules create allow-health-check \ |
- 開始監控
1 | gcloud compute instance-groups managed update fancy-fe-mig \ |
- 針對後端服務的 URL 做監控
1 | gcloud compute http-health-checks create fancy-fe-frontend-hc \ |
1 | gcloud compute backend-services create fancy-fe-frontend \ |
Kubernetes (K8S)
- 設定地區:
gcloud config set compute/zone us-east1-b - 建立 Cluster:
gcloud container clusters create nucleus-webserver1 gcloud container clusters get-credentials nucleus-webserver1- 用 image 建立服務
kubectl create deployment hello-app --image=gcr.io/google-samples/hello-app:2.0 - 把 port 轉出來
kubectl expose deployment hello-app --type=LoadBalancer --port 8080
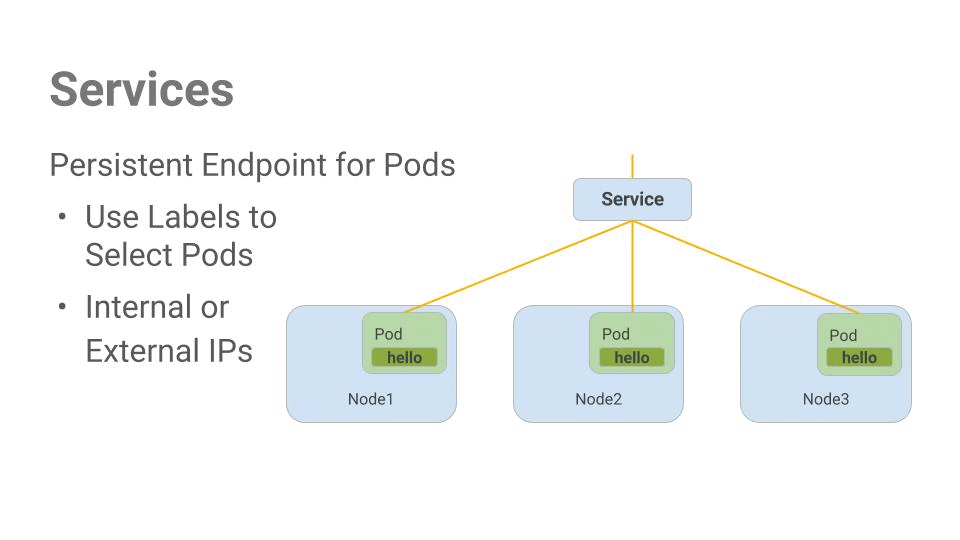
Kubernetes 中最小運算單位是 Pod,一個 Pod 可以包含多個容器共用 IP 和資源,多個 Pod 組成一個完整的 Service 方便做水平的擴充和附載平衡等等。
圖片來源: https://google.qwiklabs.com/
Pod

Service
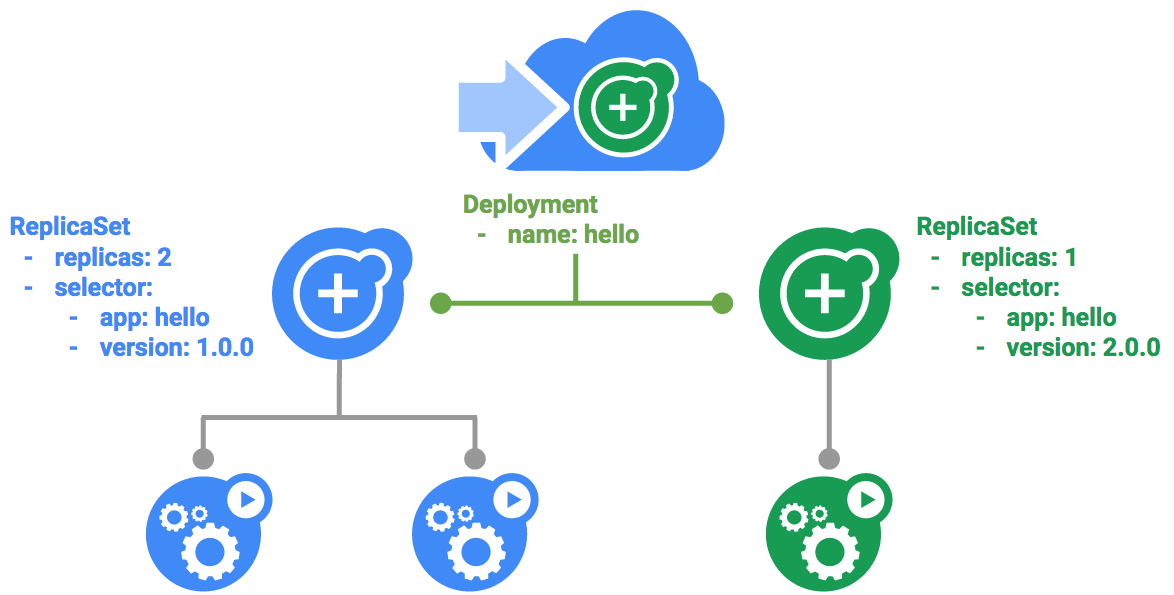
不同的 Services 間的非同步協作可透過第三方 Firebase 的 Pub/Sub 來取代直接叫用,會讓整個系統能夠更彈性,在升版的過程能夠因為這樣的架構達到滾動式更新的效果。
動式更新
各步驟中常用的指令:
- kubectl get pods
- kubectl get services
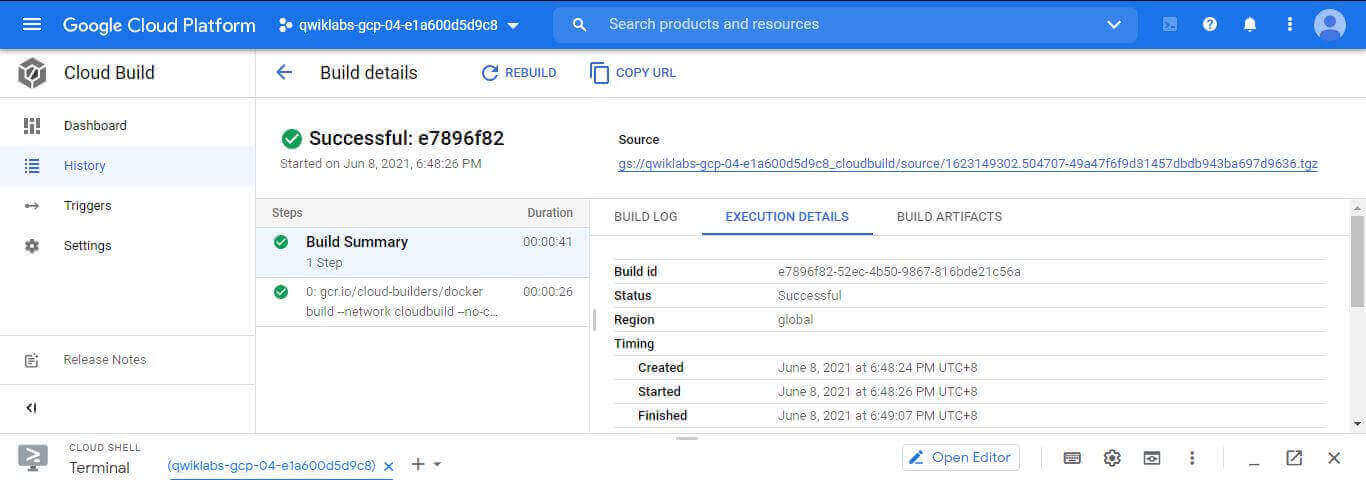
Cloud Run
Cloud Run 是最簡單的一種,透過 Knative 將 Kubernetes 的配置包進來,可以更簡單地把網站部屬到 Cloud Run,使用者只要先準備好 Image 就好了。
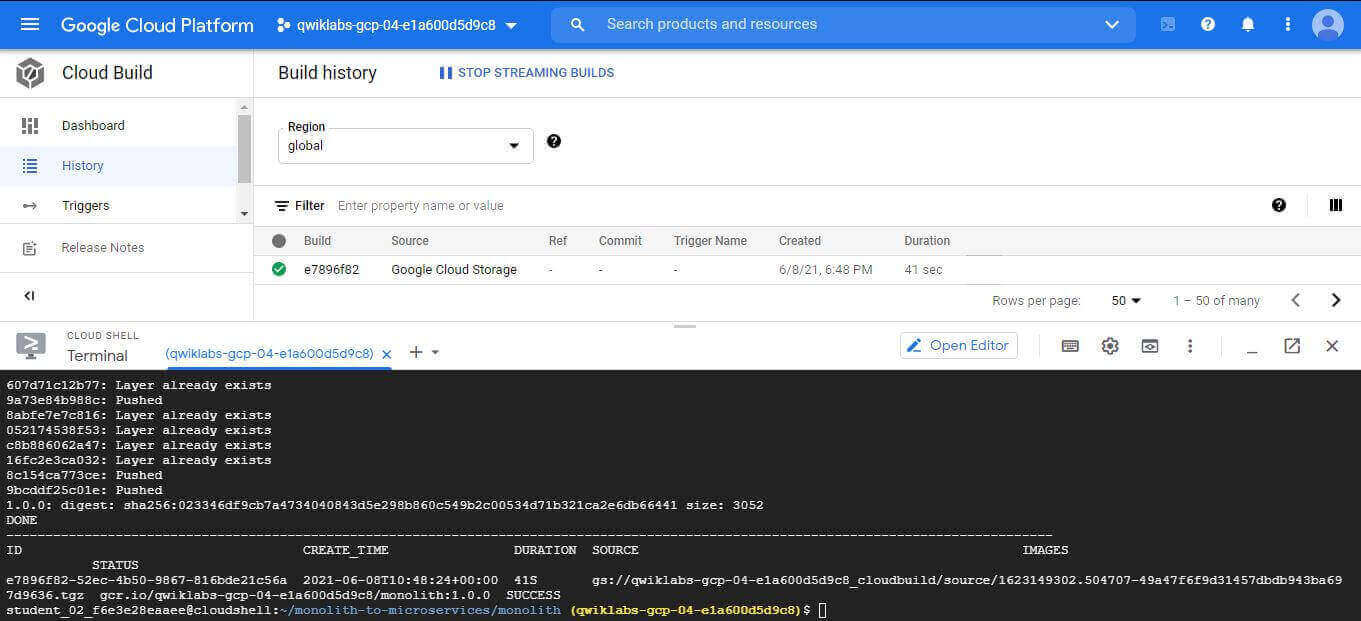
- 建立一個 Image
gcloud builds submit --tag gcr.io/${GOOGLE_CLOUD_PROJECT}/monolith:1.0.0 . - 發布容器
gcloud run deploy --image=gcr.io/${GOOGLE_CLOUD_PROJECT}/monolith:1.0.0 --platform managed
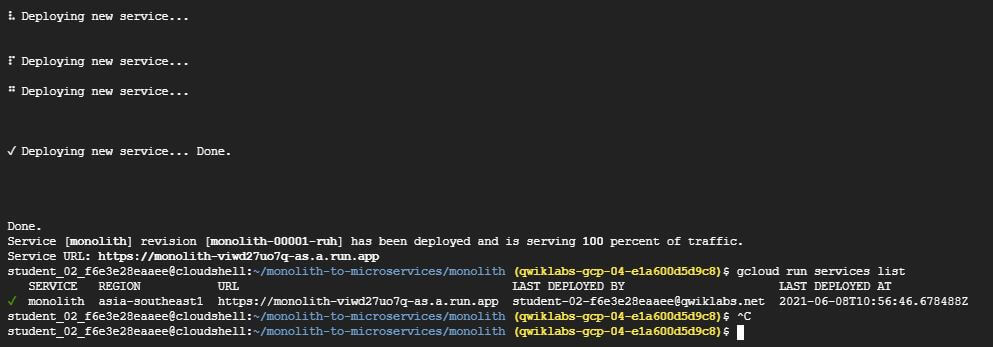
需要更新版本的話,就只要推一版新的上去就搞定gcloud builds submit --tag gcr.io/${GOOGLE_CLOUD_PROJECT}/monolith:2.0.0 .
官方教學: https://cloud.google.com/run/docs/quickstarts/prebuilt-deploy?hl=zh-TW
各步驟中常用的指令:
- gcloud run services list
- gcloud run services describe monolith –platform managed

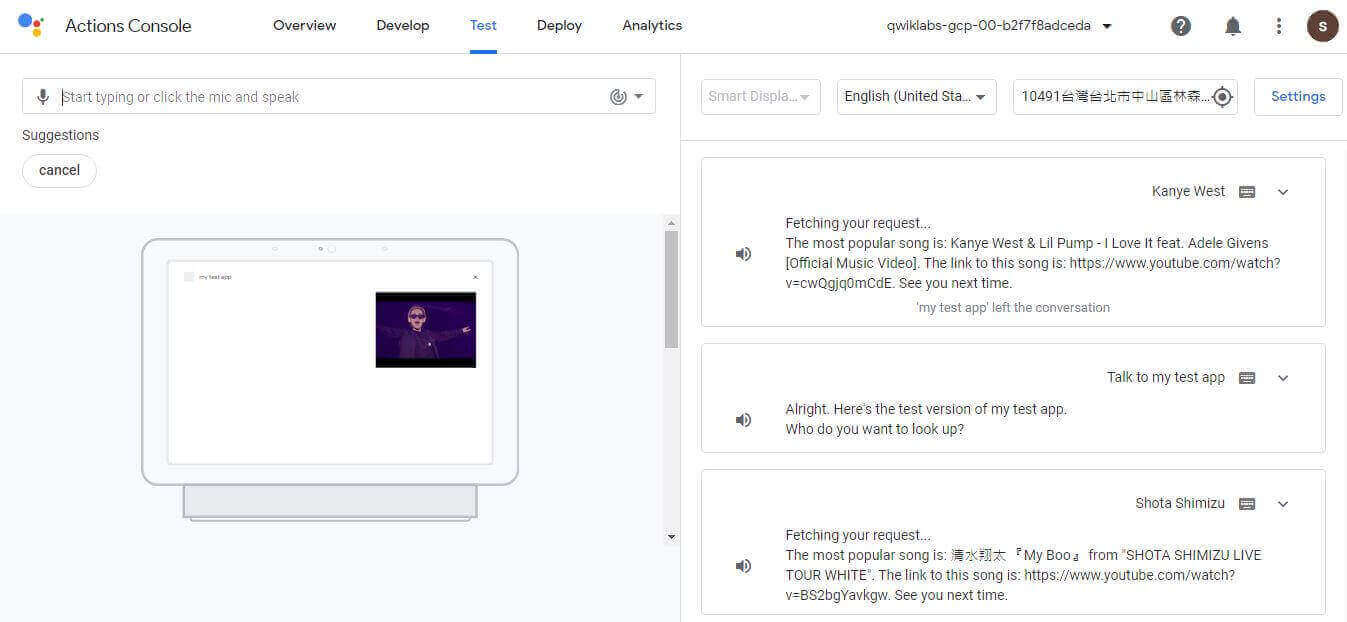
Google Assistant
在基礎關卡中 GCP 也提供了 Google 助理的實作教學,過程中主要會使用 Dialogflow 來做相關的設定,其實就很像常見的狀態機聊天機器人,只是 Google 這裡可以跟其他 GCP 相關的服務整合,也提供了基本的 AI 整合。
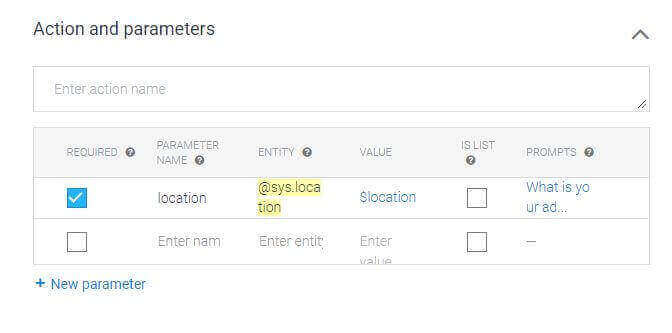
請助理幫忙查詢資料
先輸入一些使用者回應,像是各種地址格式

針對剛才的輸入設定格式
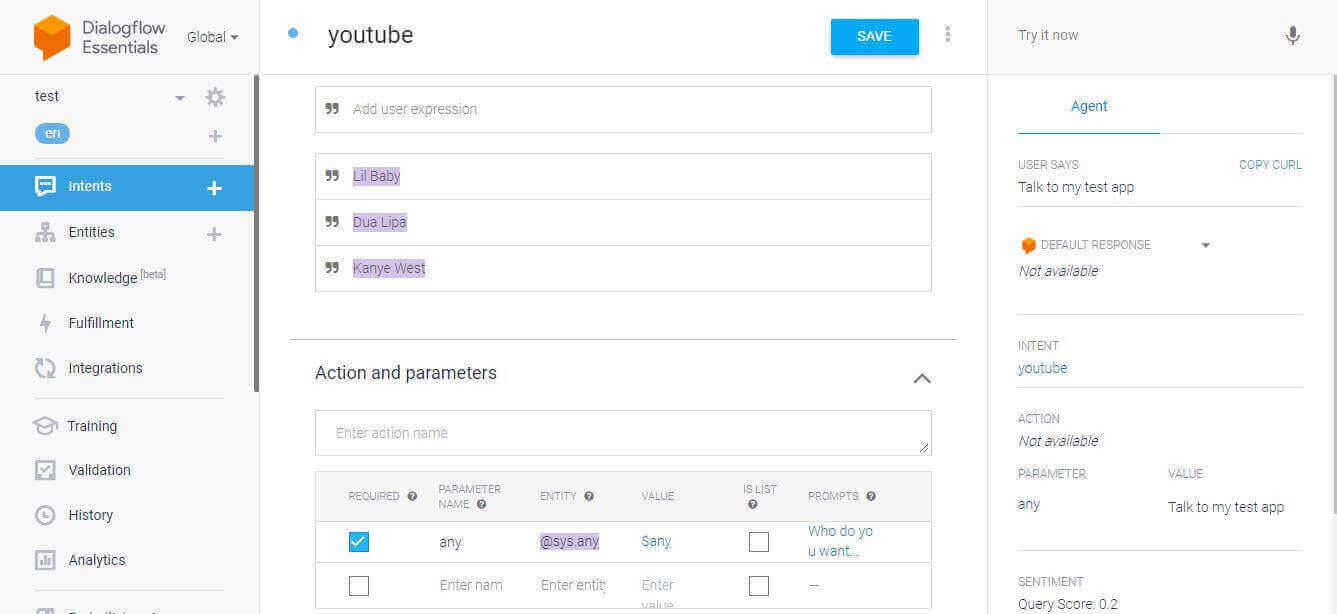
調整相關參數後 Google 就能夠自動辨識出使用者打的字是想回答什麼問題
Cloud Function
在沒有架設後端服務的情況下,可以透過撰寫 Cloud Function 來提供服務。底下是在實作 Google Assistant 時官方提供的例子,當我們收到一個 any 的歌手名稱時,會透過 YouTube 的 API 協助查詢結果並回傳。
1 | ; |
Big Query
使用起來的方式就是寫 SQL,但資料匯入方式就更多元,最神奇的是可以排程匯入,匯入後還可以透過 DataStudio 做視覺化。
- csv
- Cloud Storage
- Google Sheet
- Query 回來的資料
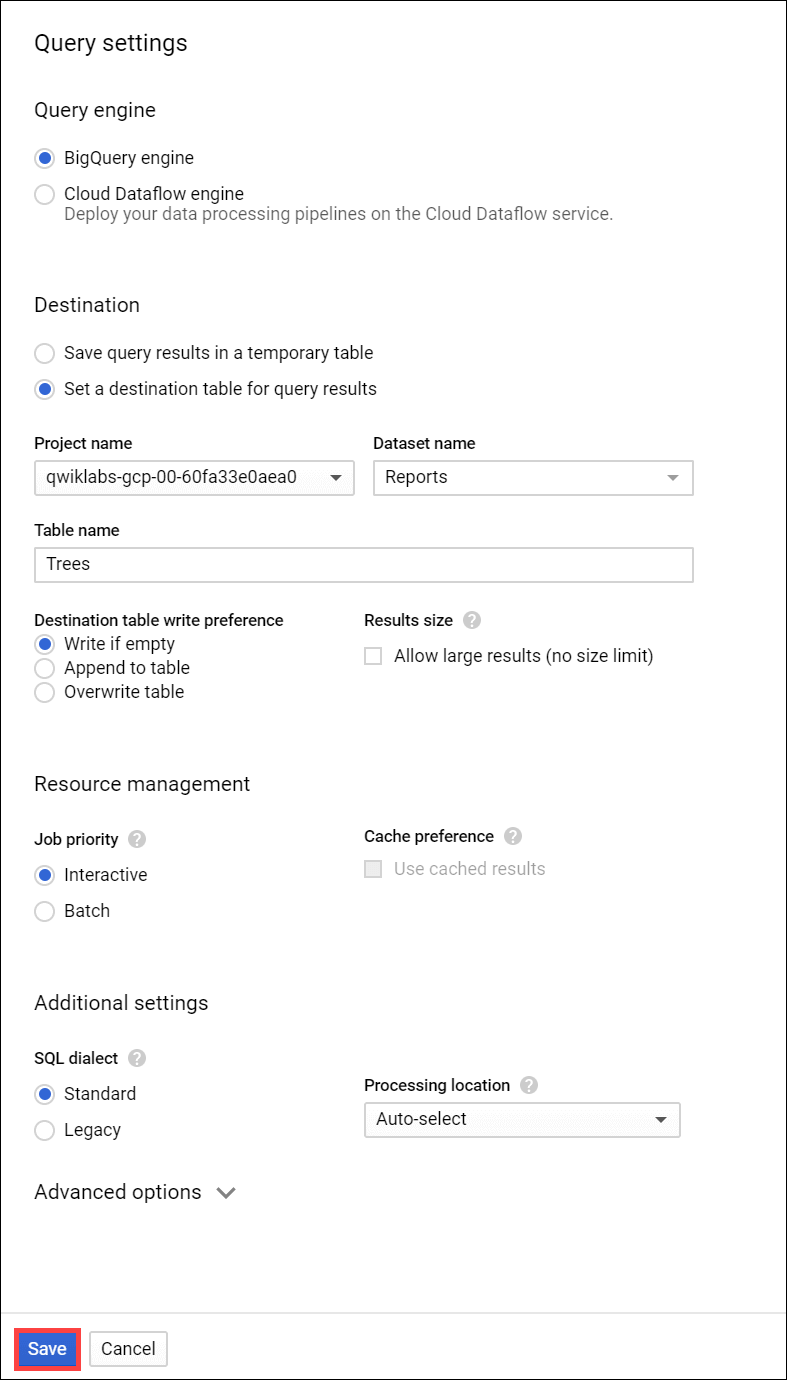
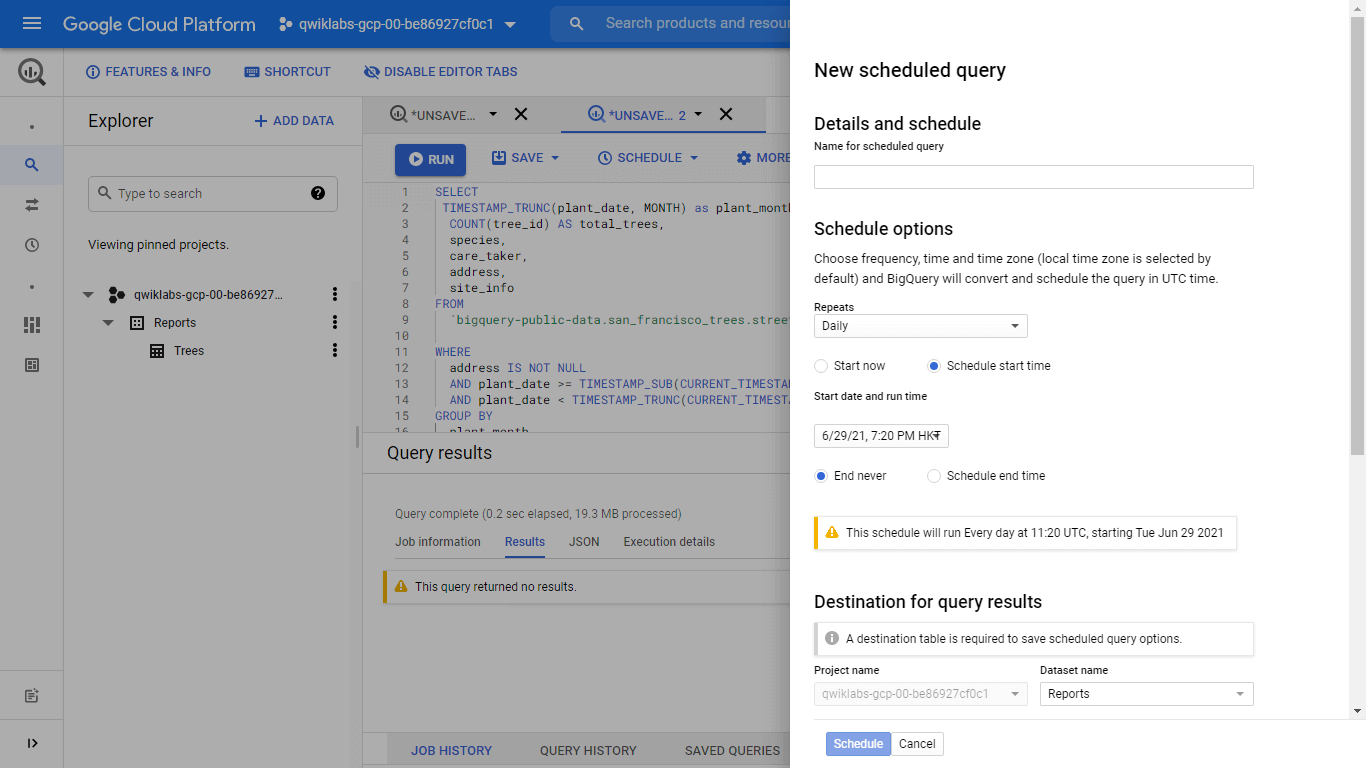
- 排程定時 Query 回來的資料
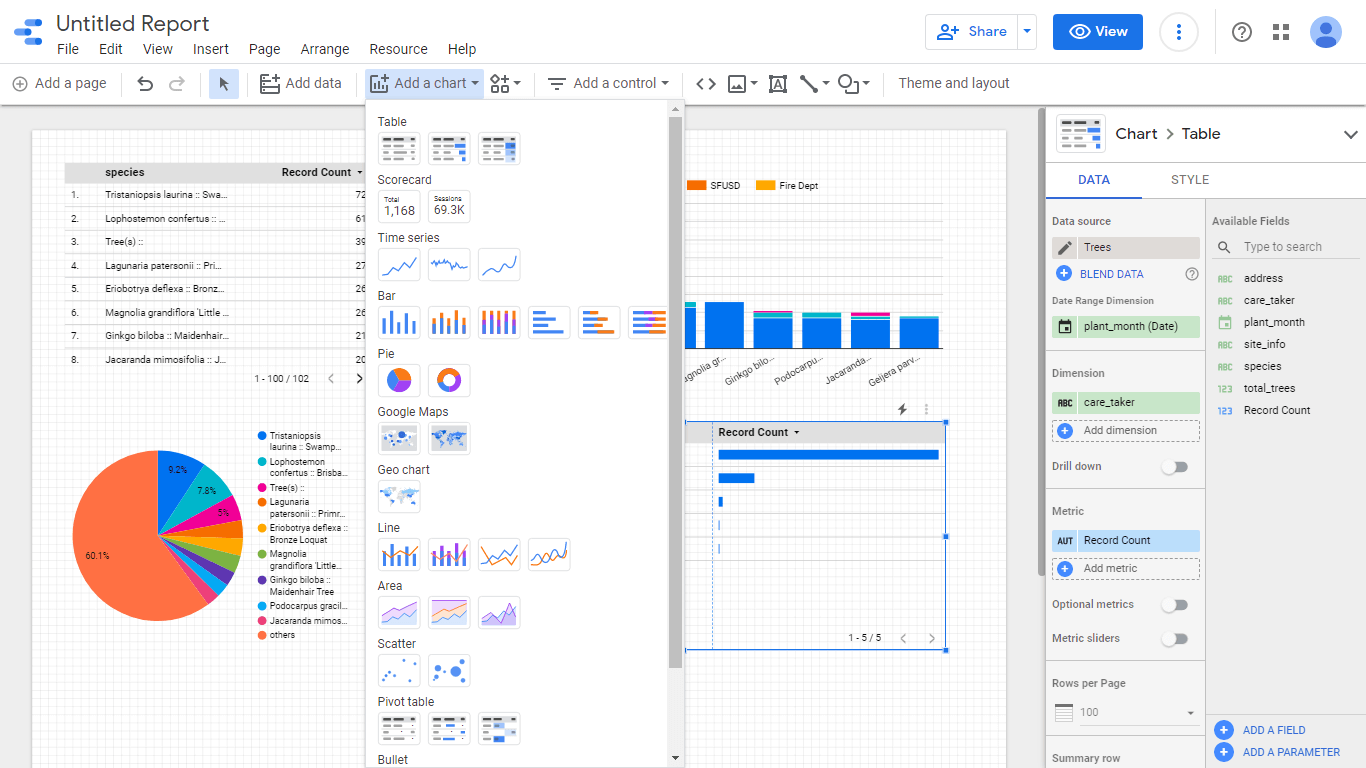
在把資料匯進來之後,還可以透過 DataStudio 做相關視覺化報表,神奇的是表格還會依照自己覺得最佳的方式自動畫出來。
DataStudio 資料來源選擇 Big Query
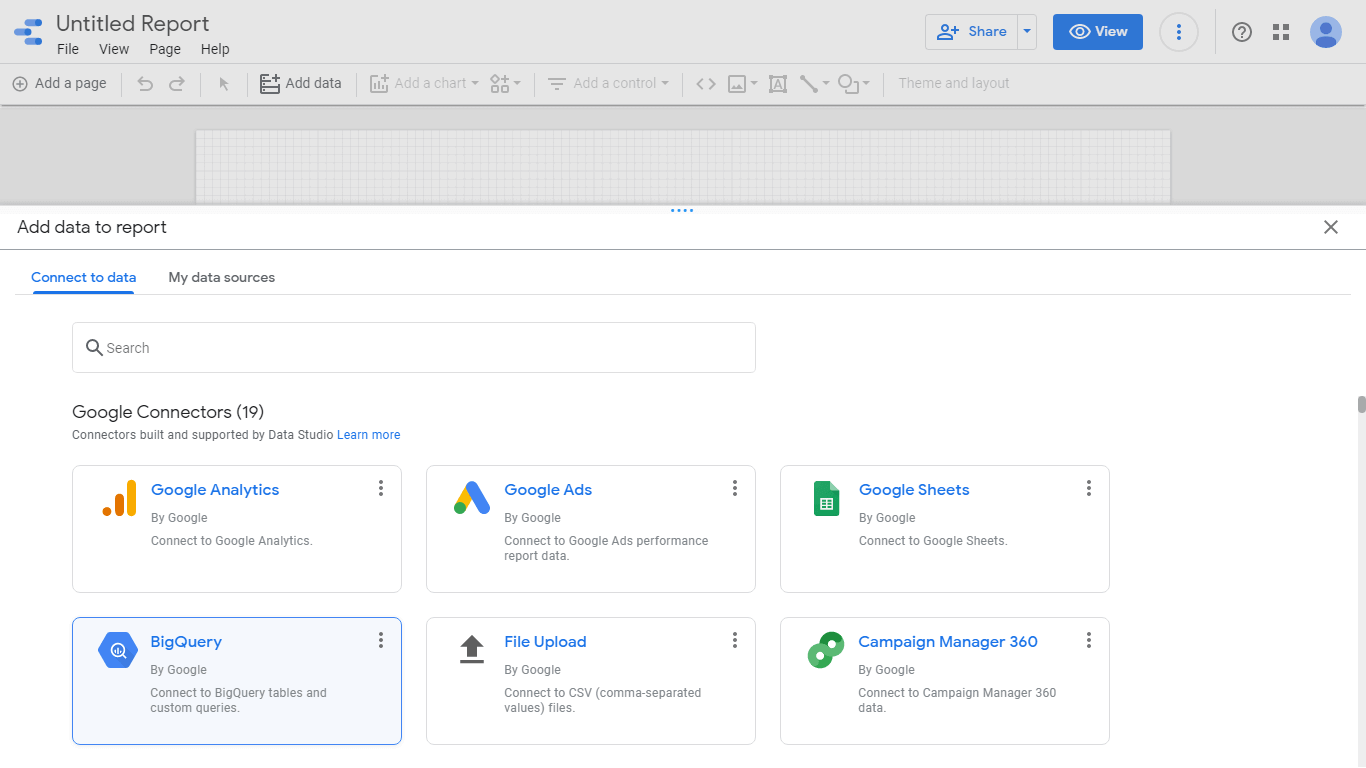
選擇相關的資料表
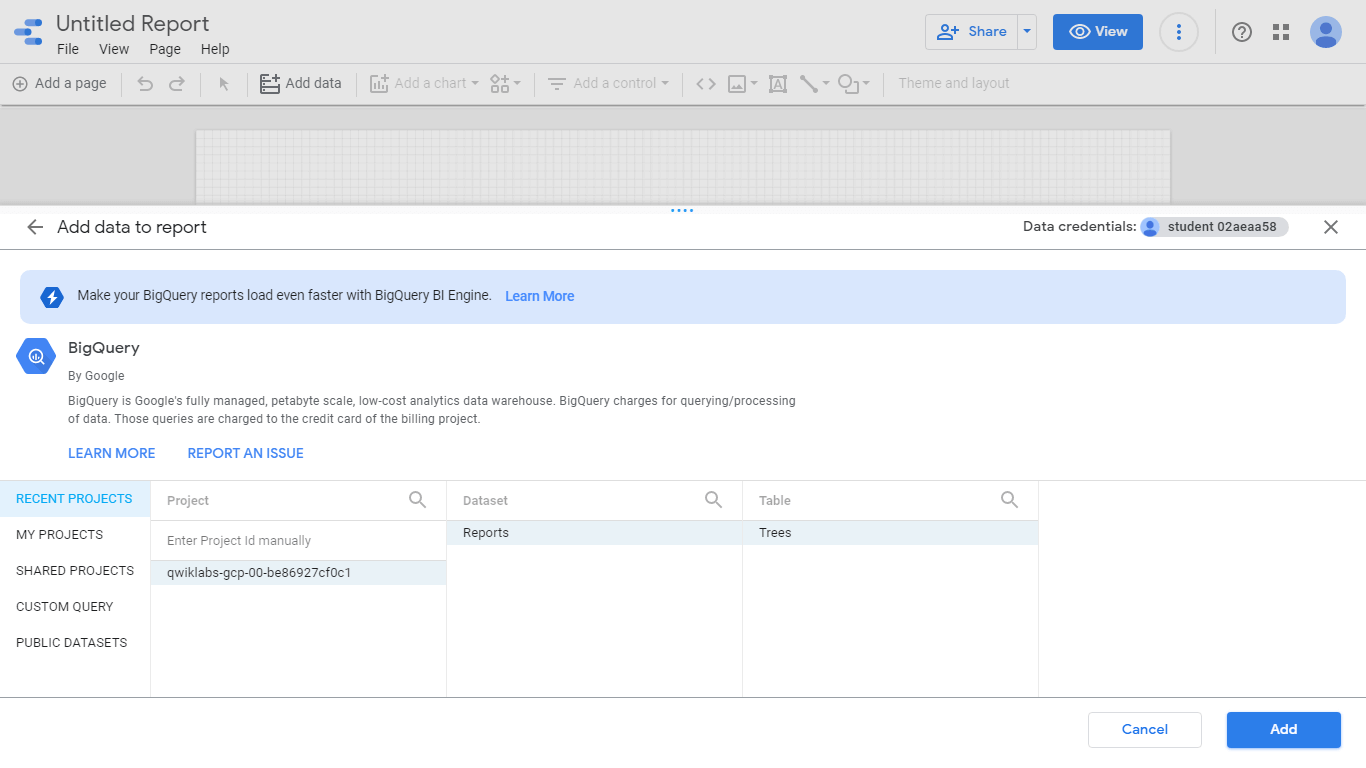
加入圖表,收工!
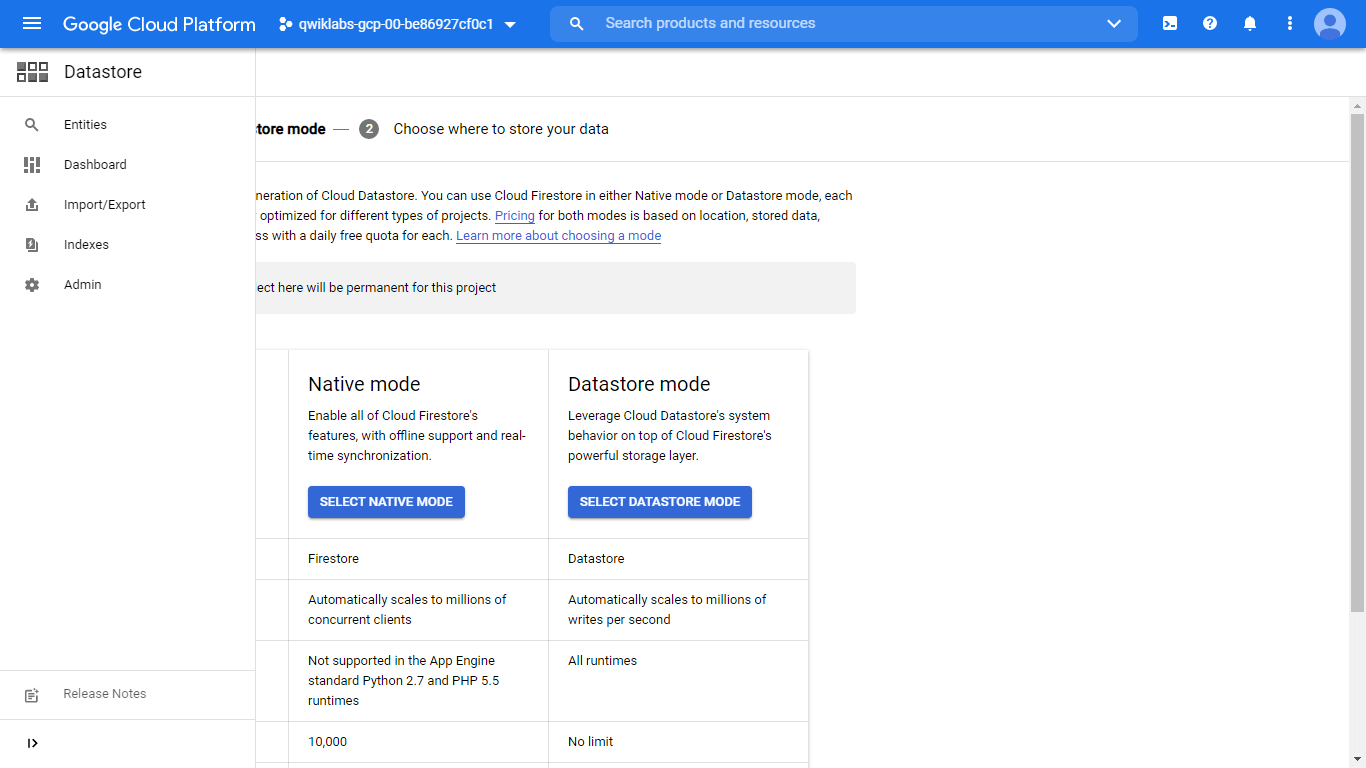
Firestore Native Mode
破關的過程中常常會需要使用 Firestore Native Mode 但按照官方教學在 Firestore 中是找不到這個設定的,最後經過我多次爬文後才發現原來新版本搬到 DataStore 中了。
FAQ:GCP 雲端架站常見問題
Q1:GCE 與 Cloud Run 該如何選擇?
A:如果您需要安裝特殊的系統層級套件或長時間跑背景程式,選 GCE;如果您是開發 Web API 或 Frontend 應用,且希望「有流量才付費」,Cloud Run 是更高品質且低維運成本的首選。
Q2:使用 BigQuery 會不會產生天價帳單?
A:BigQuery 是按「掃描量」計費。若資料量極大,請務必在 SQL 中指定 WHERE 時間範圍,避免執行全表掃描。另外,善用「預覽」功能預估掃描量,是控制預算的高效習慣。
Q3:K8S 的「滾動式更新」有什麼實務優點?
A:它能讓您的網站「一邊換零件一邊跑」。K8S 會先啟動一個新版 Pod,確認健康檢查 (Health Check) 通過後,才關閉一個舊版 Pod。這樣即使新版程式有 Bug 啟動失敗,舊版仍能維持運作,實現真正的零停機部署。
站內搜尋
其他相關文章

Linux 伺服器架站與問題排除
2021-07-07本指南旨在助您輕鬆應對 Linux 伺服器網站架設的完整流程與常見問題。從系統配置、資源優化到錯誤排解,掌握高效網站運行的關鍵,確保您的服務穩定上線。

Nginx 服務管理與監控工具推薦
2022-12-25深入探討 Nginx 服務的管理與監控,推薦 Nginx Proxy Manager、Nginx GIXY 和 GoAccess 等工具,助您有效提升服務效率與安全性。本文帶您了解如何選擇與應用這些關鍵解決方案。
2025 AWS 台北高峰會心得
2025-06-222025 AWS 台北 Region 正式啟用!本篇指南深度解析 AWS 台灣本地機房帶來的低延遲與資料落地優勢。我們將分享雲端高峰會亮點:從低軌衛星計畫、AI 算命應用到 GameDay 技術實戰演練。前 150 字直接回答 AWS 台北區域的核心價值,助您掌握高品質的雲端轉型契機,領取專屬開發者福利。
最新的文章
AI Agent Skill 實戰
2026-03-21AI Agent Skill 開發指南
2026-03-20前端工程師十年多元職涯發展
2026-03-14